


In this article we will cover how to connect Devo SOAR and Devo. To learn more about Devo SOAR, start here.
Table of Contents:

Watch the Video
Connecting Devo with Devo SOAR
- Navigate to Automations > Integrations.
- Search for Devo.
- Click Details, then the + icon. Enter the required information in the following fields.
- Label: Enter a connection name.
- Reference Values: Define variables here to templatize integration connections and actions. For example, you can use https://www.{{hostname}}.com where, hostname is a variable defined in this input. For more information on how to add data, see 'Add Data' Input Type for Integrations.
- Verify SSL: Select option to verify connecting server's SSL certificate (Default is Verify SSL Certificate).
- Remote Agent: Run this integration using the LogicHub Remote Agent.
- URL: Devo server URL.
- Devo cloud URLs for these two regions:
- Permission: Select permission. Devo has different tokens for read and write access.
- API Token: API Token to connect to devo instance.
This is the OAuth token. Make sure for read, it has permission to read all tables that is, the target table should be '***' and for write, Http Send should be allowed.
Run Query in Devo Instance
Input Field
Choose a connection that you have previously created and then fill in the necessary information in the following input fields to complete the connection.
| Input Name | Description | Required |
|---|---|---|
| Templated Query | Templated Query to execute. | Required |
| Explode Results | Yes/No. Keep results in a single dict, or explode into separate rows? (default: No). | Required |
| Add Info Fields | Yes/No. Add information fields to output? (default: No). | Required |
| Start Time | Column name from the parent table to lookup value for start time (UTC). Example: 2017-05-22T10:00:00. (Default: Batch start time). Note: Setting this time in the future will result in a slow query. | Optional |
| End Time | Column name from the parent table to lookup value for end time (UTC). Example: 2017-05-22T10:00:00. (Default: Batch end time). | Optional |
| Event Time Range | Subtract a time range from end time to calculate a new start time (ignored if Start Time column provided above). Examples: 5m, 1h, 1d, or 0.5d. | Optional |
| Limit | Limit of rows to be returned (Default: 500, Max: 50000). | Optional |
Output
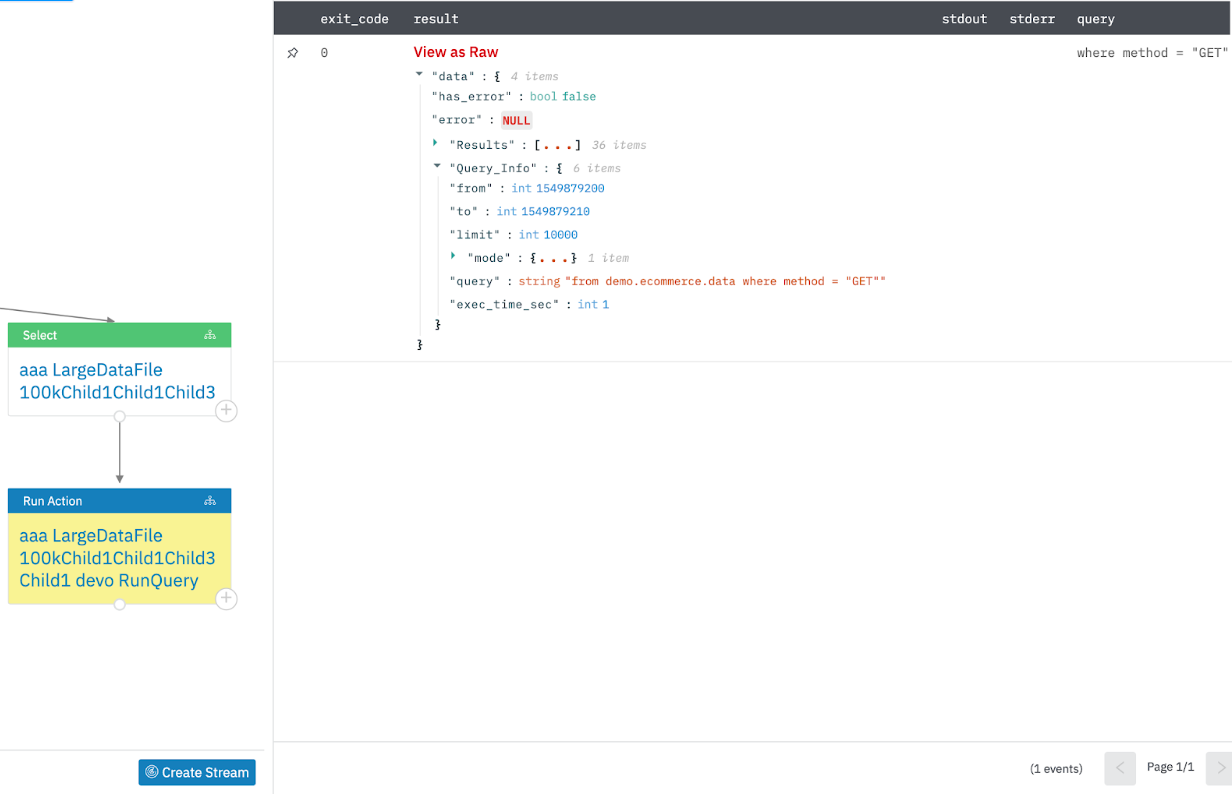
A JSON object containing multiple rows of result:
- Templated Query: from demo.ecommerce.data {{query}}
- Explode Results: No
- Add Info Fields: Yes
- Start Time: startT
- End Time: endT
- Limit: 10000
Send Events
Send Events to Devo instance. This action will send one event per row in the parent table.
Input Field
Choose a connection that you have previously created and then fill in the necessary information in the following input fields to complete the connection.
| Input Name | Description | Required |
|---|---|---|
| Devo Domain | The name of your Devo domain Example: "dev@CompanyName". | Required |
| Message Tag | Tag (event table) for messages sent to Devo. | Required |
| Message | Column Name from parent table containing the message. Default is all columns. | Optional |
| Message Hostname | Hostname to use as message source. | Optional |
Output
A JSON object containing multiple rows of result:
{"success": true, "error": null, "has_error": false}
If you would like to learn about other integrations with Devo SOAR, please reference the full documentation available here.